今回はblueprintの使い方について解説します。
動画で学習したい方はこちらをどうぞ。
【udemy】Python+FlaskでのWebアプリケーション開発講座!!~0からFlaskをマスターしてSNSを作成する~
![]()
- Flaskとは
- Blueprintとは
- Blueprintの使い方
- Blueprintアプリの起動・実行結果
Flaskとは
Flaskとは、Pythonで提供されるWebフレームワークの一つです。
Blueprintとは
Blueprintとは、Flaskの中で使われるモジュールで、アプリを分割することができ、プログラムの保守性を向上させることができるライブラリのことです。
https://msiz07-flask-docs-ja.readthedocs.io
たとえば、Webサーバー「 http://127.0.0.1:5000/ 」をそれぞれ
http://127.0.0.1:5000/site1
http://127.0.0.1:5000/site2
http://127.0.0.1:5000/site3
のように割り当ててサイトを分割管理することができます。
Blueprintの使い方
Blueprintのインストール
BlueprintはFlaskのパッケージに含まれています。
既にFlaskがインストールされている場合は、追加でpipインストールする必要はありません。
Flaskのインストール
Flaskをインストールしていない場合は、こちらのコマンドを実行します。
pip install Flask
Blueprintの宣言
Blueprintは、主にviews.pyで宣言して使用します。
from flask import Blueprint
ディレクトリ構成
run.pyを実行することで、アプリが起動します。
今回はhome.htmlからsite1、site2のそれぞれのアプリに遷移を行うようにアプリを構成しています。
.
├── views1.py
├── views2.py
├── templates
│     ├── home.html
│     ├── site1
│     │     └── hello1.html
│     └── site2
│           └── hello2.html
├── static
│     ├── stylesheet1.css
│     └── stylesheet2.css
│
└── run.py
run.py
from flask import Flask, render_template
app = Flask(__name__)

from views1 import site1_bp
app.register_blueprint(site1_bp)

from views2 import site2_bp
app.register_blueprint(site2_bp)

@app.route('/')
def home():
    return render_template('home.html')

if __name__ == '__main__':
    app.run(debug=True)
各Viewsファイルからアプリのを情報を取得して登録している。
Viewsで指定したアプリ以外にも、それらのアプリの起点となるhtmlファイルを設定できます。(ここではhome.html)
この設定でのファイルマッピング
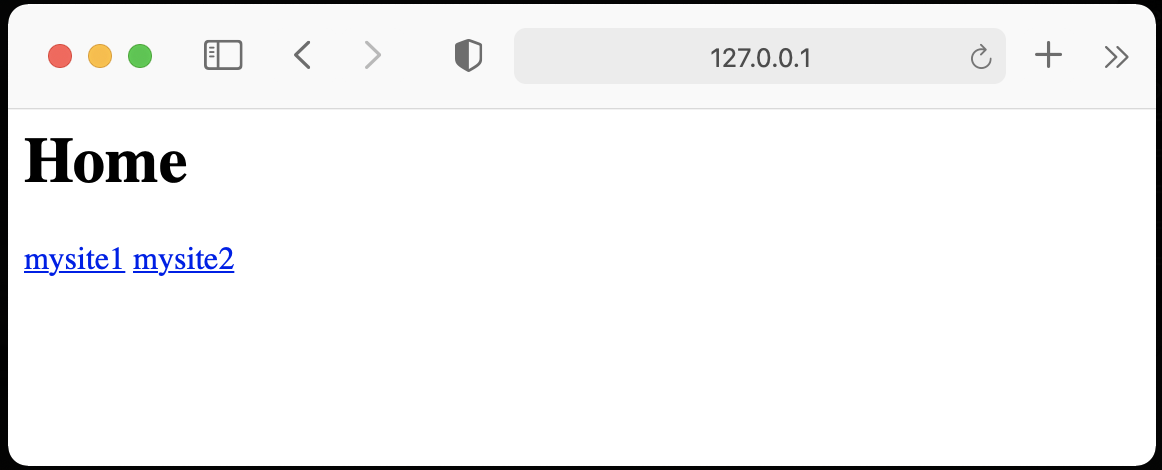
http://127.0.0.1:5000/ にアクセス → home.htmlが表示される。
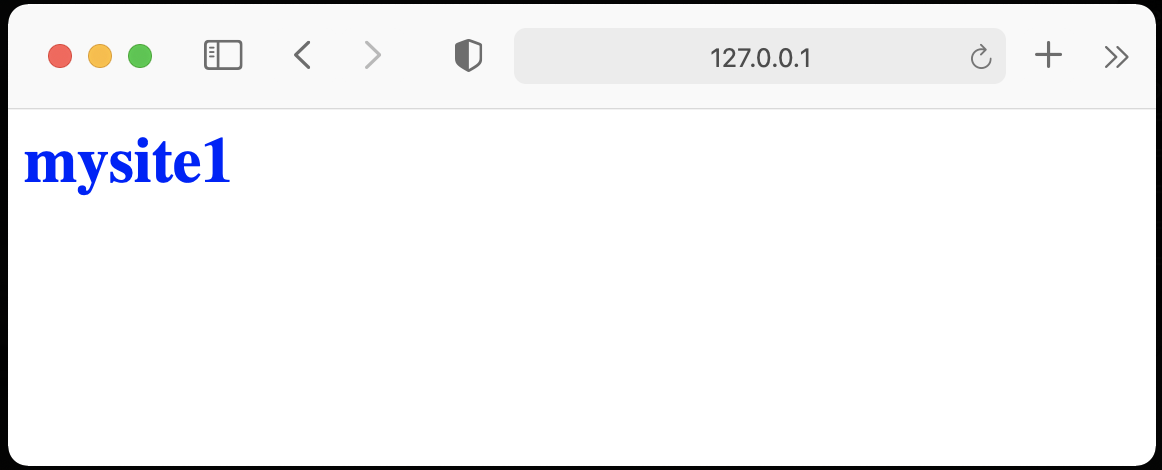
http://127.0.0.1:5000/site1 にアクセス → hello1.htmlが表示される。
http://127.0.0.1:5000/site2 にアクセス → hello2.htmlが表示される。
hello1.html、hello2.htmlのマッピングについては、次のviews.py で設定を行っています。
views1.py
from flask import Blueprint, render_template

site1_bp = Blueprint('site1', __name__, url_prefix='/site1')

@site1_bp.route('/')
def hello():
    return render_template('site1/hello1.html')
views2.py
from flask import Blueprint, render_template

site2_bp = Blueprint('site2', __name__, url_prefix='/site2')

@site2_bp.route('/')
def hello():
    return render_template('site2/hello2.html')
Blueprint()を使用し、viewsファイルを設定しています。
Blueprintの第一引数にはBlueprintの名前を設定し、
第二引数には、ブループリントのパッケージ名を設定します。
url_prefixには、アプリのルートパスを設定しています。
参考 : Blueprintの引数
Blueprint(name, # Blueprintの名前を指定
import_name, # ブループリントのパッケージ名を指定
static_folder, # 静的ファイルを配置するフォルダを指定
static_url_path, # 特に指定しなければ url_prefix の値が設定される
template_folder, # アプリのテンプレート検索パスを指定
url_prefix, # アプリのルートパスを指定
subdomain, # ブループリントルートが一致するサブドメインを指定
url_defaults, # ブループリントがルーティングするデフォルト値の指示
root_path) # import_nameが取得できなかった場合の検索先を指定
インスタンス化したBlueprintは上記views.pyの例のようにデコレータ「@site1(2)_bp.route('/')」として使用します。
htmlへのパスは「Blueprintの引数で指定した url_prefix」+ 「@Blueprintインスタンス.route('パス')」で設定されます。
今回の例では次のようになります。
http://127.0.0.1:5000/site1 にアクセス → hello1.htmlが表示される。
http://127.0.0.1:5000/site2 にアクセス → hello2.htmlが表示される。
html、CSSファイルの定義
home.htmlからhello1.htmlとhello2.htmlへ遷移できるようになっています。
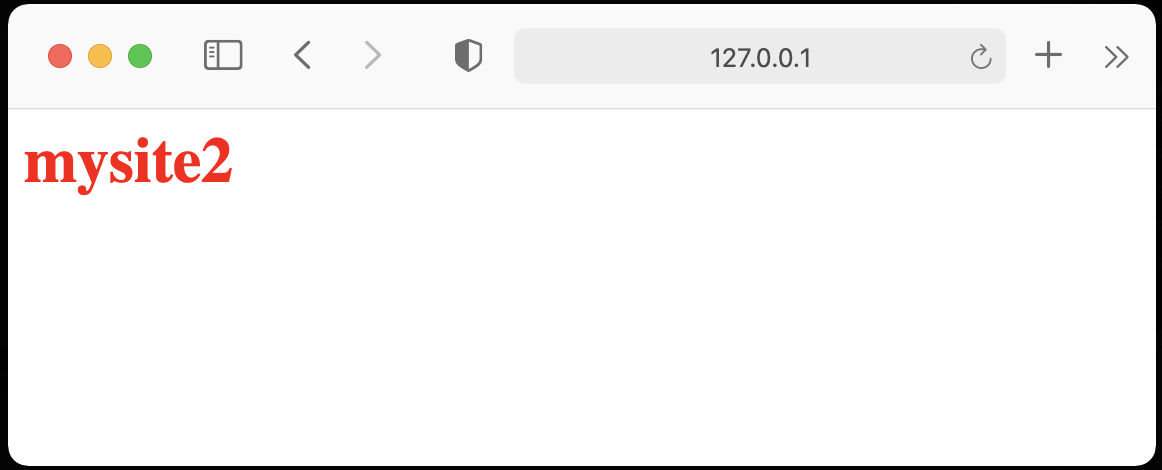
また、hello1.htmlの文字色は青、hello2.htmlの文字色は赤にしています。
home.html
<h1>Home</h1>
<a href="{{url_for('site1.hello')}}">mysite1</a>
<a href="{{url_for('site2.hello')}}">mysite2</a>
hello1.html
<link rel=stylesheet type=text/css href="{{ url_for('static', filename='stylesheet1.css') }}">
<h1>mysite1</h1>
hello2.html
<link rel=stylesheet type=text/css href="{{ url_for('static', filename='stylesheet2.css') }}">
<h1>mysite2</h1>
stylesheet1.css
h1 {color: blue;}
stylesheet2.css
h1 {color: red;}
Blueprintアプリの起動・実行結果
run.pyを実行します。
実行がうまくいくとコンソールに次のような表示がされます。
 * Serving Flask app "run" (lazy loading)
 * Environment: production
   WARNING: This is a development server. Do not use it in a production deployment.
   Use a production WSGI server instead.
 * Debug mode: on
 * Running on http://127.0.0.1:5000/ (Press CTRL+C to quit)
 * Restarting with stat
 * Debugger is active!
 * Debugger PIN: 170-543-620
画面の表示は次のようになります。
・http://127.0.0.1:5000/にアクセス
・home.htmlでmysite1をクリック(http://127.0.0.1:5000/site1にアクセス)
・home.htmlでmysite2をクリック(http://127.0.0.1:5000/site1にアクセス)
おわりに
このように、Blueprintを使用すると1つのサーバで複数のアプリケーションを登録することができます。
今回の例では作成していませんが、templates、static、views.pyをそれぞれ別のディレクトリに配置してアプリを実行することもできるのでとても便利です。
参考


